Help Center
❯ AtData Services ❯ Insights
When you’ve purchased Email Intelligence, here is how you customize the results you receive.
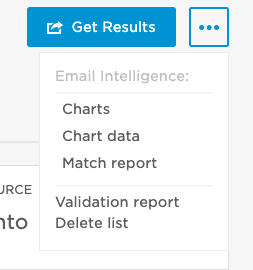
If you’ve purchased Email Intelligence, click the “Get Results” button on the List Overview screen to obtain your results. Here you’ll see three options for Email Intelligence: Charts, Chart data, and Match report.
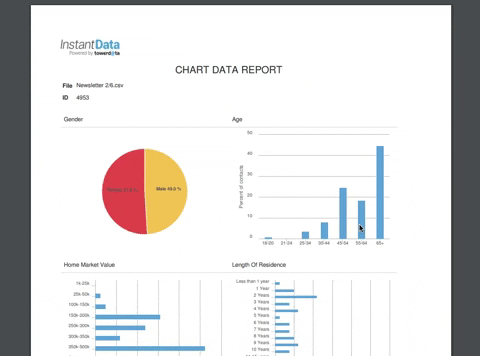
If you select “Charts” from the menu, you will download a PDF that includes charts which illustrate your match rate to the Demographic and Household fields.
Select the “Chart data” option allows you to download a csv file that contains the breakdown of values available across the Email Intelligence fields. This is great for looking at the raw match rate data.
And clicking “Match report” allows you to download a csv file that contains your exact number of matches per field, along with a match percentage.
Again, if you’re not interested in downloading either charts or reports right now, you can simply click the blue “Get Results” button to the left of the chart and report options.
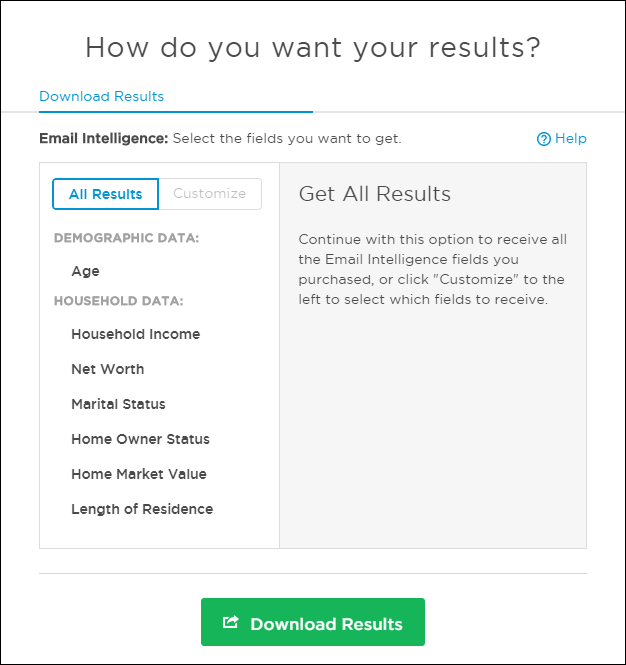
Once clicking “Get Results”, you’ll see a pop up screen.
If you imported your email list from your email service provider (ESP) or marketing platform via one of our integrations, you’ll first be given a choice of how you would like to export those results back to your ESP. If you manually uploaded your file, you will see the following screen:
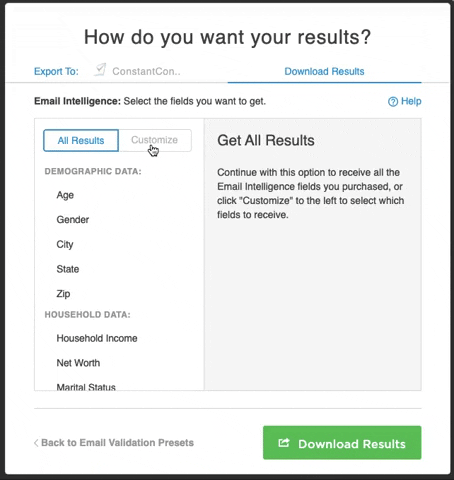
By default, we’ll deliver all the fields you’ve purchased. If that’s what you want, just click the button on the bottom and you’ll be all set.
However, there are a few customization options available.
First, if you are exporting directly to your ESP and choose to update your list, you can choose to customize your exported results by clicking the “Customize” tab next to the “All Results” tab. Then you can select the categories you’d like to export directly to your marketing platform.
On the other hand, if you are exporting directly to your ESP and choose to create a new list (not available for ALL ESPs) or choose to download your results directly to your computer, you have a few other customization options.
Custom Results
Click the “Customize” tab to begin. All fields are pre-selected, but you can then toggle the button next to each field name you’ve purchased in order to omit or include desired fields in your results. From here, within the fields you choose to include, you can select various ranges within to include or exclude from your results, as shown above.
Once you’ve made your selection(s), click the “Download Results” (or “Export Results” if you’re sending data to your ESP/marketing platform) button. Then you’ll be taken to a progress screen as we prepare your results for you. You can either wait for your results to be ready, or we will send you an email with a link to download them.
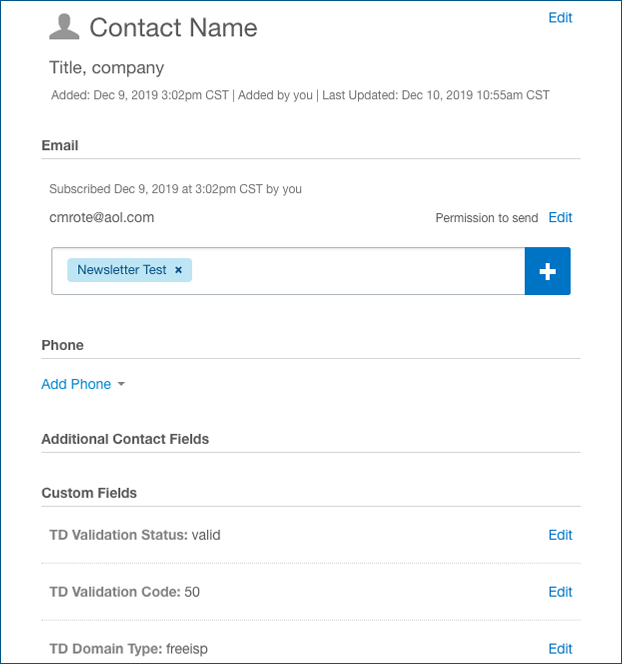
If the data is going to your email service provider in the form of a new list (again, if available in your ESP), the fields we create in your ESP/marketing platform will start with “TD “. For example, “Validation Status” will be created as “TD Validation Status” in your ESP account. This is to avoid any conflicts if you already have a field with the same name.
What’s next?
Here’s a little tip on how often to use Email Intelligence services.
 Affiliate Marketing
 Automotive
 eCommerce and Retail
 FinTech
 LeadGen
 Nonprofit and Political
 Payments
 Technology Platforms
 Tourism and Hospitality