Help Center
❯ Integrations
How to verify and enhance email addresses in Marketo with InstantData.
Validating the email addresses on your Marketo list or appending demographics with our Email Intelligence service is super easy. This article covers importing your Marketo list into InstantData for processing and manually exporting InstantData results back to Marketo. Please note that we can’t export results directly back to your Marketo account because the Marketo system doesn’t allow us to automatically create the fields we need.
Importing Your Marketo List
Your first task is to login to your InstantData account. From here, select the “Marketo” integration from the list on InstantData.
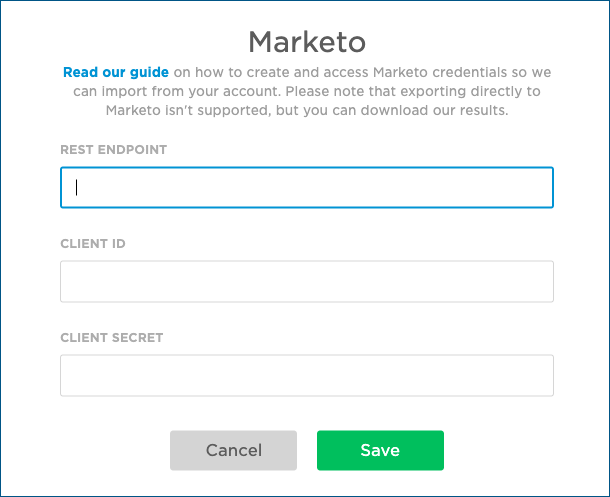
To first find your Marketo API REST endpoint, enter your Marketo account, select Admin from the top navigation bar, then select Web Services from the Integration Module.
From here, you’ll scroll to the bottom of the page, then copy the Endpoint URL from the REST API module.
Next, you’ll need to enter your Client ID and Client Secret. These can be found by accessing the Admin section of your account, then clicking “Launchpoint” in the Integrations module.
From here, you’ll click “View Details” on the selected Custom service.
Once you’ve entered the appropriate credentials, click the green “Save” button.
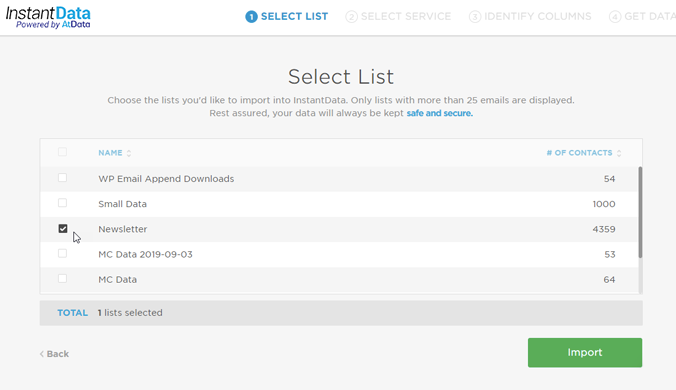
After allowing InstantData to access your Marketo account, you have the option to select your list to run through InstantData from the available lists and click the green “Import” button at the bottom right.
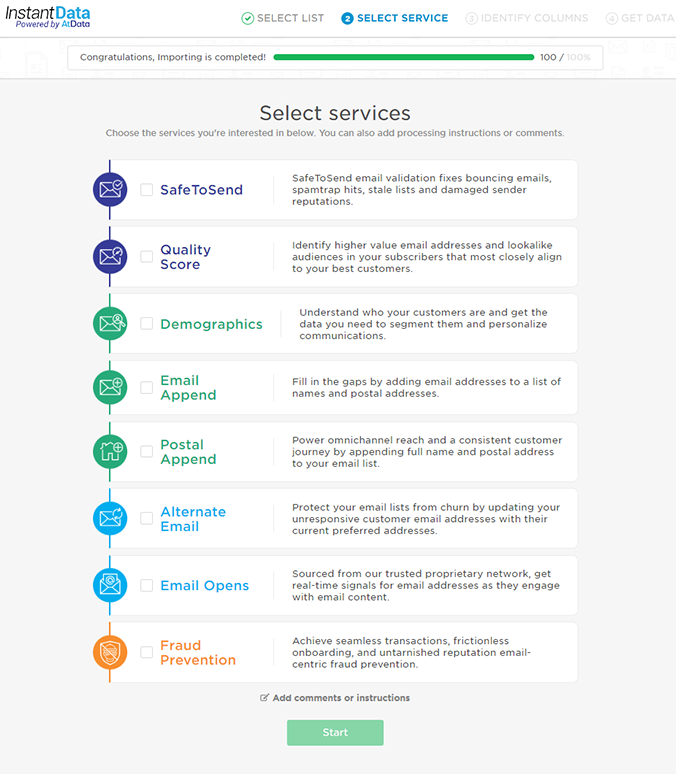
Next, you’ll proceed through the InstantData platform to select which services you’d like to run with InstantData and click the green “Start” button at the bottom of the page.
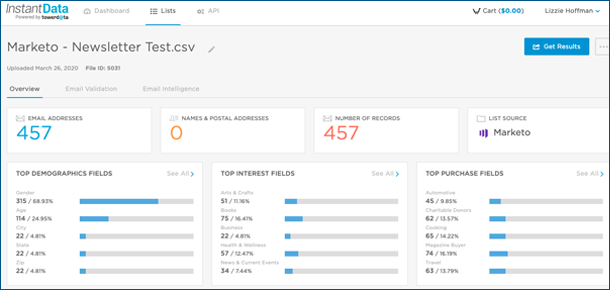
Once the data is done running, you can view the results on the List Overview page and purchase the data you need.
Exporting InstantData Results to Marketo
With the Marketo integration, you will need to first download the results after purchase as there is no automatic export capability from InstantData due to Marketo system limitations.
To begin exporting your data to a downloadable file, click the blue “Get Results” button at the top right.
You’ll get a pop-up that displays the options for downloading your results.
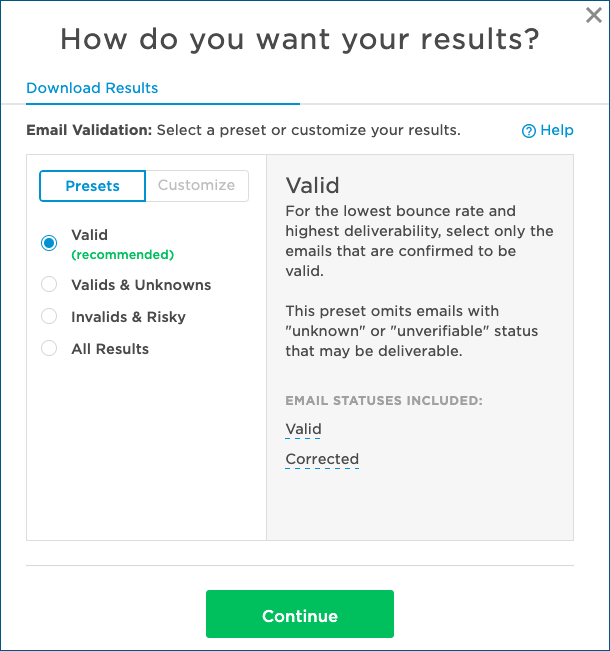
Email Validation Result Options
If you run Email Validation, the first pop up screen will provide options for downloading your Email Validation results. You can hover over each option to see a description of it on the right pane, and if you want even more detail, check out our handy help article on Email Validation result options.
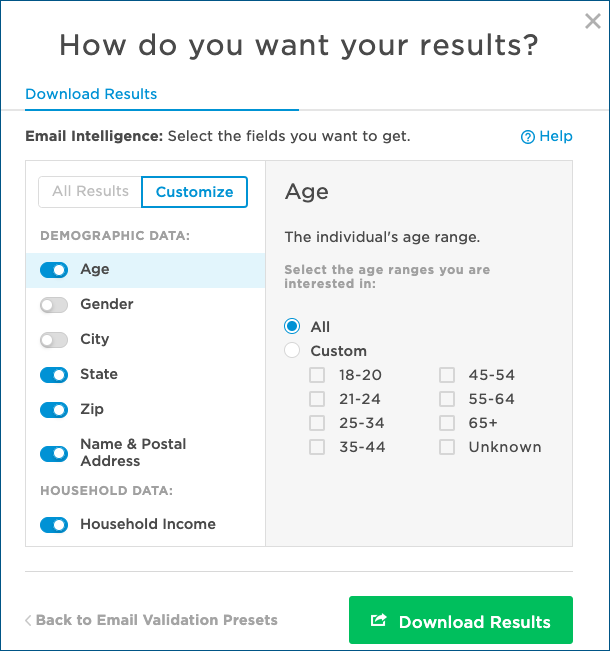
Email Intelligence Result Options
When exporting Email Intelligence results to your downloadable file, you have two options:
- all the demographics and behavioral data you purchased by selecting the “All Results” option.
- specific, chosen data fields exported by clicking the “Customize” toggle and selecting your desired data fields. Additionally, after purchasing results, when you choose “Customize” you will have the option to further customize your results by category. For example, you can select specific age ranges and genders from the list rather than downloading all results for that category.
Curious about the data available? Learn more about our Email Intelligence result options.
Starting Your Download
To finish the process, click the green “Downloading Results” button. You’ll be taken to a progress screen as we finish your downloadable file and send the download link to your email. Depending on the size of your list, it may take a few minutes to complete.
When examining your downloaded list, you will see the fields created by InstantData. These fields will all start with the prefix “TD ” to avoid overwriting any existing fields you may have with the same name.
Before importing your list to Marketo, you will need to create new custom fields in Marketo to map the TD fields. To begin importing your new list to your Marketo account, follow the instructions here provided by Marketo.
After creating the custom fields and importing the list into Marketo, you will see new fields attached to contact records.
We hope you enjoy your data!
 Affiliate Marketing
 Automotive
 eCommerce and Retail
 FinTech
 LeadGen
 Nonprofit and Political
 Payments
 Technology Platforms
 Tourism and Hospitality